What’s in My Travel Makeup Bag (UPDATE)

Hello everyone! In February, I wrote a blog post about the makeup products I brought with me on a cruise. That vacation included a lot of swimming and other water activities, so I did not bring too much makeup. This vacation, however, is to New York! Since I will be staying out of the water, I am bringing a little more makeup than I did in February.

Face Makeup

Primer: Benefit The POREfessional Face Primer

Concealer: bareminerals Correcting Concealer Broad Spectrum SPF 20  in “Light 2”

Foundation: Clinique Even Better Makeup SPF 15 in “01 Alabaster”

Powder: Tarte Smooth Operator Amazonian Clay Finishing Powder

Contour/Highlight: MAC Sculpt & Shape Powder in “Bone Beige”

Eyebrows: Anastasia Beverly Hills Brow Powder Duo in “Soft Brown;” Anastasia Beverly Hills Clear Brow Gel

Setting Spray: Urban Decay De-Slick Makeup Setting Spray

Eye Makeup

Eye Shadow Primer: Urban Decay Eyeshadow Primer Potion- Original

Eye Shadow: Urban Decay Naked Basics

Eyeliner: Kat Von D Ink Liner in “Trooper”

Mascara: Urban Decay Perversion; Benefit They’re Real!; Make Up For Ever Smoky Extravagant; Tarte Lights, Camera, Lashes; Buxom Mascara in “Blackest Black”

Lips

Lip Balm: Lasting Smiles Organic Lip Balm

Lip Liner: NYX Lip Liner in “Mauve”

Lipstick: Tarte Amazonian Butter Lipstick in “Golden Pink;” Kat Von D Everlasting Liquid Lipstick in “Lolita”

And that is the makeup that I am bringing to wear daily in New York! What makeup products can you not travel without? Let me know down below!

New Posts!

Hello everyone! School has officially ended even though graduation is still two weeks away. This week will be spent creating blog posts and I will publish them next week! 

A big thank you to all of you for being so patient with me and my inactivity!

If you have any suggestions for what you’d like to see, let me know down below!

What’s in My Travel Makeup Bag

Hello everyone! Since the Mardi Gras holidays are coming up, I am preparing to go on a cruise and need to start packing! The climate will be a little warm, and I will be swimming, so I know that I probably won’t be wearing a full face of makeup all of the time. This also means that I will not be packing as much makeup as I normally would.


Face Makeup

Primer: Benefit The POREfessional Face Primer

Concealer: bareminerals Correcting Concealer Broad Spectrum SPF 20  in “Light 2”

Foundation: Clinique Even Better Makeup SPF 15 in “01 Alabaster”

Powder: Tarte Smooth Operator Amazonian Clay Finishing Powder

Contour/Highlight: MAC Sculpt & Shape Powder in “Bone Beige”

Eyebrows: NYX Tinted Brow Mascara in “Brunette”

Setting Spray: Urban Decay De-Slick Makeup Setting Spray

Eye Makeup

Eye Shadow Primer: Urban Decay Eyeshadow Primer Potion- Original

Eye Shadow: stila Eye Shadow in “Kitten;” Urban Decay Naked Basics

Mascara: Urban Decay Perversion; Benefit They’re Real!; Make Up For Ever Smoky Extravagant; Tarte Lights, Camera, Lashes; ULTA Amped Lashes; Buxom Mascara in “Blackest Black” (I bring multiple mascaras because they all have different results)

Lips

Lip Balm: EOS Lip Balm

Lipstick: Tarte Amazonian Butter Lipstick in “Golden Pink;” MAC Lipstick in “Razzle-Dazzler;” BECCA Beach Tint in “Guava”

Lip Gloss: Liquid Lip Smacker in “Vanilla” (I cannot even tell you how long I have owned this)

And that is all the makeup I am bringing on the cruise with me! There will definitely be an updated travel makeup post in the near future to show the normal amount of makeup that I would take with me. What are some makeup products you cannot travel without? Let me know down below!

January IPSY!

Hello everyone! I have officially received my first ever Ipsy bag, and I could not be more excited! I am very happy with the products I received and hope the next Ipsy bags will be just as impressive!

ipj0.2

ipjswatch

1. Lasting Smiles Organic Lip Balm

ipj5

Lasting Smiles is a company that uses a portion of its profits to help pay for cleft surgeries for children. Also, this lip balm has one of those minty flavors that tingles a little after you apply it, which I actually really like!

2. Marsk Mineral Eyeshadow in “You’re Toast”

ipj2

This is a shimmery neutral loose eyeshadow pigment that is very subtle yet still adds a nice shimmer when applied. I absolutely love this product because the color is right up my alley, and the shadow itself blends very well!

3. The Balm Mr. Write (Now) Eyeliner Pencil in “Jac”

ipj4

Ipsy advertised that eyeryone who received the January bag would receive one of these eyeliners in one of two color choices. I was sincerely hoping for this color, which is a warm golden-brown, because I already have an eyeliner similar to the other The Balm eyeliner.

4. Tucker Ashley Advanced Peptide Eye Complex

ipj1

I have yet to try this and have never heard of this brand before, but I am sure this product will be amazing!

5. Dirty Little Secret Lipstick in “Vengeance”

ipj3

I have always wanted a lipstick color just like this but never actually bought one. The formulation and color payoff is absolutely amazing, and I cannot wait to wear this shade!

And those are all of the products that came in my January Ipsy bag! If you are subscribed to Ipsy, what products did you receive in your January bag? Let me know down below!

Winter Formal Makeup Tutorial

Hello everyone! Tonight is my school’s winter formal dance, which is dressier than other dances but not as dressy as prom. That means that my makeup will be a little bit more involved: contouring, highlighting, false eyelashes, etc. Let’s get on with the tutorial!

First, I prep my face with a few sprays of MAC’s Fix + followed by Benefit’s The POREfessional Face Primer. After prepping my face, I move onto applying my Clinique Even Better Makeup Foundation in “01 Alabaster” with a damp makeup sponge. I then use Tarte’s Smooth Operator Amazonian Clay Finishing Powder to set my foundation. For my contouring and highlighting, I use the MAC Sculpt and Shape Powder in “Bone Beige.” I apply a little highlight on the bridge of my nose, my cupid’s bow, cheek bones, and under my brow bone while applying the contour in the hollow of my cheeks, down the sides of my nose, and along my jawline.

For my eyebrows, I sweep my NYX Tinted Brow Mascara in “Brunette” over my entire eyebrow and use the “Faint” eyeshadow from Urban Decay’s Naked Basics for any extra filling-in.

Onto the eyes! I usually go for a natural look, so I am going to use Urban Decay’s Naked Basics for this look. You can find my Naked Basics makeup look here!

For my lips, I am using NYX’s Lip Liner in “Mauve” to line and fill in my lips. Over that, I am applying the Tarte Tarteist Lip Paint in “tbt” for a gorgeous matte lip!

The absolute last step is to spray my face with Urban Decay’s De-Slick Makeup Setting Spray.

And that’s it for this makeup tutorial! If you had to pick only three makeup products to wear tomorrow, what would they be? Let me know down below!

How To Depot NYX and MAC Eyeshadows

Hello everyone! I have recently purchased two Z-palettes, one small and one large. I also have a few eyeshadows that I want to depot and place in the Z-palette. This method does use heat to melt the glue off of the eyeshadow pan, so PLEASE be careful when toughing the hot metal pans. Also, it is a great idea to depot your eyeshadows in a well-ventilated area because you are heating and melting plastic.

depot10

Tip: Buy the refill eyeshadow pans from MAC instead of the normal eyeshadows. You do not have to depot the refill pans, and they are $6 cheaper!

Things you will need:

Eyeshadows you want to depot

A hair straightener

Wax paper

A butter knife or cosmetic spatula

Magnetic palette

Steps:

1. Take your butter knife or cosmetic spatula and pop off the eyeshadow. On NYX and MAC eyeshadows, there is a groove in the middle of the casing that separates the eyeshadow pan from the rest of the packaging. PLEASE BE CAREFUL!

2. Plug in your hair straightener, and give it time to heat up.

3. Place a small piece of wax paper on your hair straightener. Place your eyeshadows on top of the wax paper and wait about a minute.

depot5

4. CAREFULLY remove the eyeshadow from the heat source and turn it over. Poke the bottom of the plastic casing with your knife or spatula until the actual eyeshadow pan begins to come out.

5. Continue to wiggle the metal eyeshadow pan out of the plastic. THE METAL PAN WILL BE HOT.depot9

6. Set your eyeshadow pan aside until cool, then transfer to your magnetic palette.

depot11

And you’re done! What are your top favorite eyeshadows? Let me know down below!

MAC Lipstick Collection & Reviews

Hello everyone! I definitely do not own as many MAC products as other beauty bloggers, but my collection will be growing shortly! As of now, I own three MAC lipsticks in three different finishes, which I will be swatching today.

The first lipstick is “Angel.” This lipstick is a pinkish nude with a frost finish. One of my friends gifted me this lipstick for my birthday a few years back, and is also the first MAC product I ever owned! Because this color is so neutral, “Angel” can be worn at any time or any season!

angel

The next lipstick is “Razzle-Dazzler.” This lipstick is a nice light, creamy orange color with a lustre finish. Out of all three lipsticks, this one has to be my favorite finish. This color is also great for spring time!

rdaz

The final lipstick is “Media,” which is a dark purple-red shade with a satin finish. I always wear this lipstick for portraits because it photographs so beautifully! “Media” is also the perfect color to wear during fall and winter!

media

I know this was a super short collection, but this is only a small fraction of the makeup I do own. Are there any specific brands or other areas of makeup y’all would like me to swatch? Also, what are your favorite MAC products? Let me know down below!

Quick & Easy Holiday Makeup Routine

Happy Holidays! As you may know from my other blog posts, I am a die-hard fan of matte and neutral colored makeup, so this tutorial is not all that involved. This tutorial is essentially my go-to makeup routine for special events, including Christmas parties! It’s also super easy and extremely versatile!

The first thing I do before applying any makeup is wash my face and then apply my skincare products. If I am going to be applying lip product for my makeup look, I will use a lip scrub to scrub away any dead skin to reveal soft lips. If you want to make your own lip scrub, you can check out my last post called Homemade Lip Scrub!

To prep my face, I use the MAC Fix+, wait for that to dry, and then apply my Benefit POREfessional Face Primer. Next, I mix a little moisturizer into my foundation and apply this all over my face and neck with a sponge. *Make sure that you use a damp sponge when applying your makeup!* Instead of using concealer, I usually use the mini beautyblender to apply foundation on top of blemishes, red spots, and dark circles. Once I am satisfied with the coverage, I apply my Sephora 8HR Wear Mattifying Powder Foundation in “21 petal” all over my face and neck.

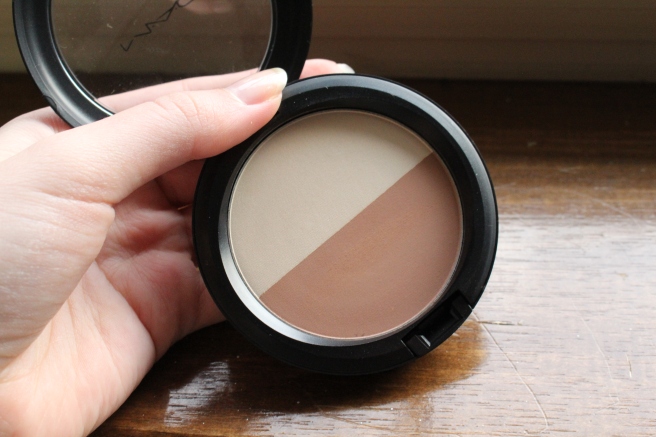
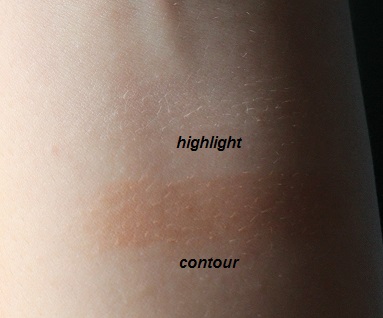
To complete the face, you can certainly contour or highlight until you are happy. I am not a fan of highlighting because my face is already shiny enough, so I only contour. For my contour, I use the MAC Sculpt and Shape Due Powder in “Bone Beige.”

Onto the eyebrows! I have been religiously using the NYX Tinted Brow Mascara in “Brunette” since August and I cannot live without it. After brushing this product over my eyebrows, I move onto the eyes. After priming my eyelids with Urban Decay’s Eyeshadow Primer Potion, I apply Stila’s eye shadow in “Kitten” all over my lid. I then use a fluffy blending brush to blend the shade “Wanderer” from Tarte’s Tartelette palette into the outer corner. To darker this area, I blend in “Dreamer” from the same palette.

This is where another versatile aspect of this look comes into play: eyeliner style. A sleek cat eye would look perfect with this look (or any other eyeliner style). However, liquid eyeliner tends to take me an extra 15 minutes to apply because I am a perfectionist when it comes to makeup, so when I only have a maximum of 30 minutes, I opt for using a black eye shadow as an eyeliner. Loading up my angled eyeliner brush, I apply “Fashionista” from the Tartelette palette close to my lash line.

Time for mascara! After curling my lashes, I apply my favorite mascara- Tarte’s Lights, Camera, Lashes- onto my top and bottom lashes. If you want, you can finish the eyes here or apply false eyelashes. I decided that since this look was for a special occasion, I would apply 3-4 of those individual lashes to each eye.

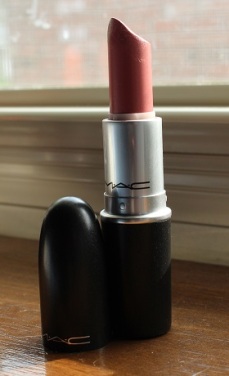
Finally, you can do whatever you want with your lips! Since the eyes are so neutral, a bold colored lip would look amazing. Instead, I opted for some lip gloss because I was feeling lazy.

And you’re finished! Since this is my first tutorial, I would really appreciate some input from y’all. For example, would you guys rather videos for makeup tutorials or picture posts like this? Let me know down below, and I hope everyone enjoys the holiday season!


MAC Sculpt and Shape Powder Review

Hello everyone! Since I’m on break from school and had absolutely nothing to do today, I thought “Hey, why not post two blog posts today?”

About a month ago, I decided that it was time I dove into the world of contouring. I was looking for a good quality product that wasn’t too expensive or too dark for my extremely pale skin tone. Around Thanksgiving, I finally picked up the MAC Sculpt and Shape Powder. This highlight and contour duo comes in three shades. The duo I purchased was the lightest shade called “Bone Beige.”

IMG_1268IMG_1269

My first impression was that I was so glad I decided to spend my $26 on this product. The highlight has a very slight shimmer to it, so when I wear it, my face doesn’t just look extra oily and shiny. The contour is very subtle since it is so light, but this shade is great for me. msaspswatch

To be honest, I do not wear this on a daily basis, but that is only because I do not wear a lot of makeup when I am going to class. However, whenever I am putting on a full face of makeup I always swipe a little bit of the contour in the hollows of my cheeks and a little bit of the highlight down my nose and on my cheek bones.

The only possible con would be the price because there are cheaper alternatives, but there are also products that are way more expensive. Considering the quality and longevity of the product, I would say the price was worth it!

If you like to contour, what products do you use?